WebTop groupware#
WebTop is a full-featured groupware which implements ActiveSync, CalDAV and CardDAV protocols.
You can install multiple WebTop instances on the same node from the Software center.
Configuration#
WebTop needs a dedicated virtual host, an FQDN like webtop.nethserver.org.
Before proceeding with the configuration, make sure to create the corresponding name record inside your DNS server. If you are planning to use a Let’s Encrypt certificate as default, make also sure to have a corresponding public DNS record.
How to configure:
access the application configuration page and enter a valid FQDN inside
WebTop virtual hostfieldenable
Request Let's Encrypt certificatebind the WebTop instance to an existing
Mail serverselect the
Default localeand theDefault timezoneclick the Save button
Inside the Advanced section, you can also configure:
the debug mode
log levels
minimum and maximum memory
Authentication#
Always use the full user name format <user>@<domain> for login to the
web application and Active Sync.
Example
Server name: mymail.mightydomain.com
Alternative mail domain: baddomain.net
User: goofy
Login: goofy@mightydomain.com
Note
Active Sync protocol is supported only on Android and iOS devices. Outlook is not supported.
Admin user#
After installation, WebTop will be accessible using the administrator user. The administrator user can change global settings and login as any other user, however, it’s not a system user and can’t access any other service like Mail, Calendar, etc.
Default credentials are:
User: admin
Password: admin
The administrator user’s password must be changed from within the WebTop interface.
Warning
Remember to change the admin password after installation!
To check the mail of the system’s user admin account use the following login: admin@<domain> where <domain> is the
domain part of server FQDN.
Example
Server name: mymail.mightydomain.com
User: admin
Login: admin@mightydomain.com
Change admin password#
Access WebTop using the admin user, then open user settings by clicking on the  menu in the top-right corner.
Go to Settings then click on Change password.
Changing the logo#
To modify and customize the initial logo that appears on the login page of WebTop,
you must upload the custom image file on the public images of the admin user and rename it login.png.
Proceed as follows:
login with the WebTop user admin
select the cloud service and public images:
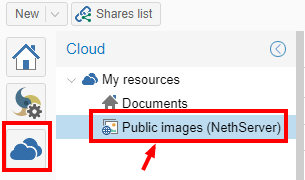
upload the image (via the Upload button at the bottom left or simply dragging with a drag & drop)
rename the loaded image so that its name is “login.png” (use right click -> Rename):

the next login will show the new logo on the login page
User settings management#
Most user settings can be directly managed by the user itself via the settings menu. Locked settings require administrative privileges.
The administrator can impersonate users, to check existing accounts using special login credentials:
User name:
admin!<username>Password:
<WebTop admin password>
While impersonating you receive similar user privileges, allowing you to control exactly what the user can see. Full administration of user settings is available directly in the administration interface, by right-clicking on a user: the settings menu will open the full user settings panel, with all options unlocked.
You can also change the email of all selected users:
select the users (Click + CTRL for multiple selection)
right-click on Bulk update email domain
Two-factor authentication (2FA)#
WebTop supports two factor authentication. The user can choose between:
To enable 2FA:
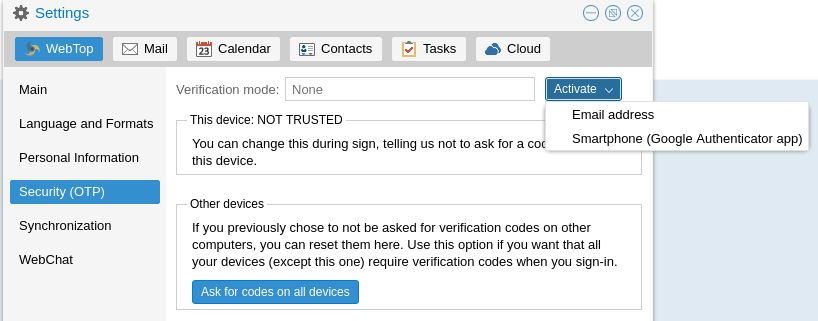
click on the menu button on the top-right corner and select the Settings icon
then select Security and click on the Activate button
ActiveSync (EAS) synchronization#
Mobile devices can be synchronized using ActiveSync. ActiveSync can be used only for contacts and calendars.
Apple iOS#
Access your iOS device, navigate to Settings and add an Exchange account following the official guide.
Fill the required fields with:
E-mail: add your mail address, eg: goofy@nethserver.org
Server: add your server public name, eg: mail.nethserver.org
Domain: leave blank
User name: enter your full user name, eg: goofy@nethserver.org
Password: enter your password
Note
iOS devices require a valid SSL certificate on the server. See TLS certificates
Google Android#
Access your Android device, navigate to Settings, then select Add account -> Exchange (or Company for older releases).
Fill the required fields with:
User name: enter your full user name, eg: goofy@nethserver.org
Password: enter your password
Then select Manual configuration and change the name of the Server field accordingly to your server public name. Finally, if you have a self-signed certificate on your server, make sure to select SSL/TLS (accept all certificates) option.
Note
On some Android releases (notably Samsung), the User name and Domain must be entered in the same line.
In this case, leave blank the field before the backslash character \, and enter the user name in the following format: \goofy@nethserver.org
Multiple calendars and contacts#
Shared calendars and address books can be synchronized using the ActiveSync protocol.
Shared resources are displayed with the owner’s name and category. The number in square brackets is the internal id. Private events are not synchronized.
Mobile devices based on Apple iOS fully support folders/categories for calendars, contacts and activities (called reminders), including original colors.
Mobile devices based on Android support only calendars and contacts, activities are not supported. Using the Google Calendar application all items will have the same color.
Installing and using the CloudCal application, you can change the colors associated with each calendar, including shared ones.
On Android devices, contacts from shared phone books are merged with the personal phone book and displayed in a single view. Contacts can be modified and changes will be saved in the original source.
Note
In order to receive data via EAS on mobile devices, shared resources (Calendars and Contacts) should have synchronization enabled (Full or Read-only):
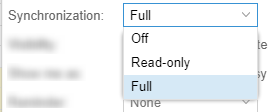
It is possible to enable or disable the synchronization for each shared resource.
To do so, just right-click on the shared resource :
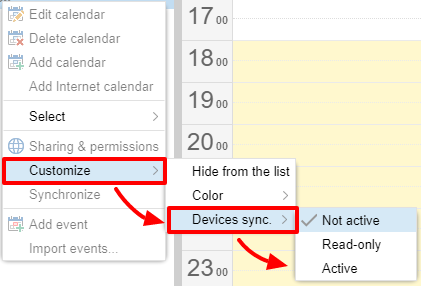
The default setting is Not active.
CalDAV and CardDAV synchronization#
Calendars and address books can be synchronized also through the CalDAV and CardDAV protocols.
To synchronize a calendar, pick up its URL link right-clicking on the calendar and selecting Links to this calendar,
then use it to configure your third-party client.
To synchronize an address book, pick up its URL link right-clicking on the address book and selecting Links to this address book,
then use it to configure your third-party client.
To authenticate, provide your credentials in the following form:
User name: enter your full user name (i.e. goofy@nethserver.org)
Password: enter your password
Some third-party clients allow simplifying the configuration through the auto-discovery feature that automatically discovers the synchronizable resources, as in the case of mobile devices (i.e. Android or iOS devices).
Note
If you are using clients that do not support auto-discovery, you need to use the full URL: https://<server_name>/webtop-dav/server.php
If you are using clients that support auto-discovery use the URL: https://<server_name>
Google Android#
A good, free, Android third-party client is Opensync.
install the suggested app from the store
add a new account clicking on + key and select Login with URL and username method
insert the
URL(https://<server_name>), full username (i.e. goofy@nethserver.org) and passwordclick on the new profile and select the resources you want to synchronize
Apple iOS#
CalDAV/CardDAV support is built-in on iOS, so to configure it:
go to Settings -> Account and Password -> Add account
select Other -> Add CalDAV or CardDAV account
insert the server name (i.e. server.nethserver.org), full username (i.e. goofy@nethserver.org) and password
Desktop clients#
Thunderbird
Thunderbird already includes support for CalDAV calendars. To synchronize the contacts with CardDAV you need a third-party add-on like Cardbook.
Outlook
The Open Source CalDAV Synchronizer plugin for Outlook supports both CardDAV and CalDAV.
Warning
Webtop is a client-less groupware: its functionalities are fully available only using the web interface!
The use of CalDAV/CardDAV through third-party clients cannot be considered a web interface alternative.
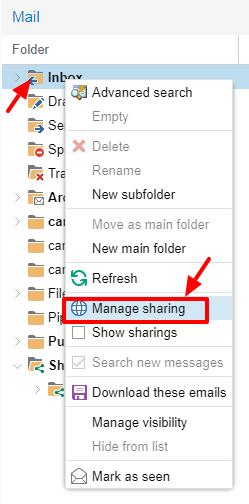
Sharing email#
It is possible to share a single folder or the entire account with all subfolders. Select the folder to share -> right click -> Manage sharing:
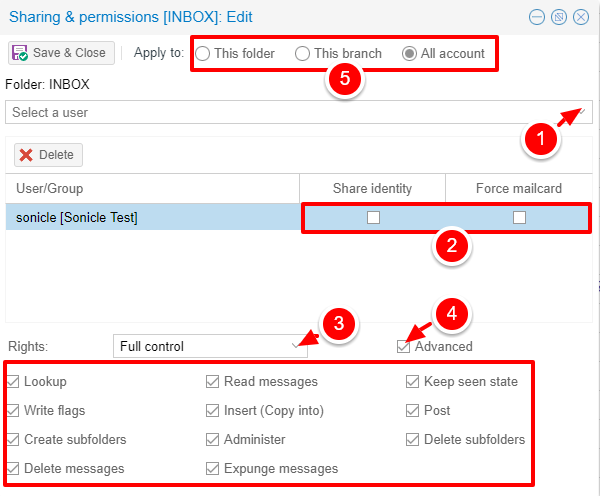
select the user to share the resource (1)
select if you want to share your identity with the user and even to force your signature (2)
choose the level of permissions associated with this share (3)
if you need to further change permissions, select
Advanced(4)finally, choose whether to apply sharing only to the folder from which you started, or only to the branch of subfolders or to the entire account (5)
Note
The Force mailcard option can be used only if the mailcard has been associated to the mail address.
Sharing calendars and contacts#
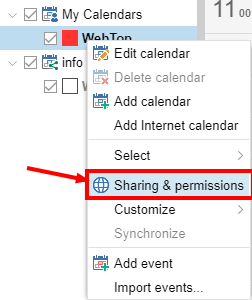
Sharing Calendar#
You can share each personal calendar individually. Select the calendar to share -> right click -> Sharing and permissions:
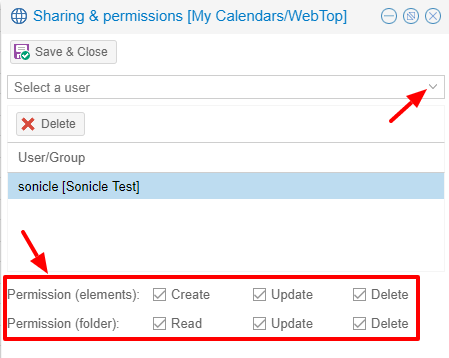
Select the recipient user of the share (or Group) and enable permissions for both the folder and the individual items:
Custom labels#
It is possible to add one or more labels to an email, a calendar event or a task.
There are two types of labels:
Private: not usable for custom fields and not visible to other users
Shared: usable for custom field panels and visible to other users
The user can normally only manage Private labels. In order to manage the Shared labels it is necessary to enable a specific authorization via the admin panel:
go to the Administration menu, then choose Domains -> NethServer -> Groups -> Users -> Authorization
add (+) -> Services -> com.sonicle.webtop.core (WebTop) -> Resource -> TAGS -> Action -> MANAGE
click OK then Save and exit
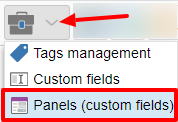
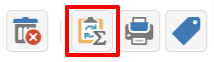
You can manage the labels from the tools  button icon at the top right corner.
The same functionality can also be reached from the individual modules by right-clicking -> Labels -> Manage labels.
Visibility can be set only during label creation. To change the label visibility you need to delete the label and create it again.
The created labels can be used in any other module like Mail, Address Book, Calendar and Tasks.
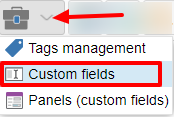
Custom fields#
With custom fields, it is possible to provide information and additional data for each contact, event or activity.
Custom fields are only available for the Address Book, Calendar, and Tasks modules and are specific to each different module.
In order to manage custom fields and their panels, the user must have a specific authorization, obtained through the administration panel:
go to the Administration menu, then choose Domains -> NethServer -> Groups -> Users -> Authorization
add (+) -> Services -> com.sonicle.webtop.core (WebTop) -> Resource -> CUSTOM_FIELDS -> Action -> MANAGE
click OK then save and exit
Users who have this authorization will find the specific button available at the top right:
To create a new custom field it is necessary to fill in at least the Name field and select the Type:
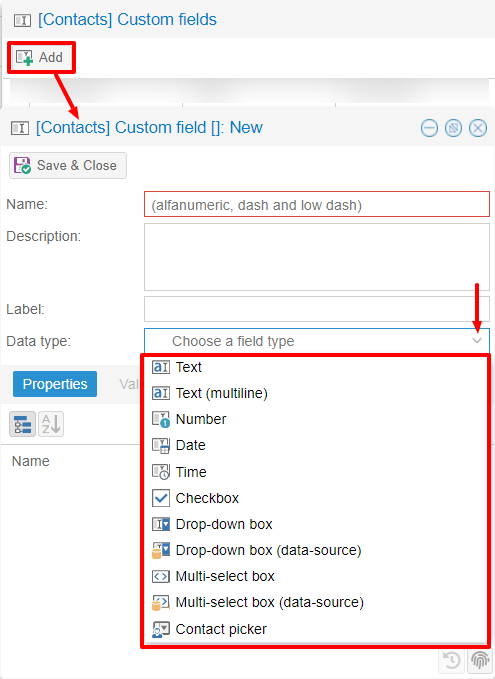
For the Name field only alphanumeric characters (including - and _) are allowed. Spaces are not allowed.
The Description field is used to add details to the field and the Label field represents the label that will be shown along
with the field.
For each field it is possible to enable two options:
Show in search bar: the field is added in the multiple search window (a new access will be required)
Show in preview: the field is shown in the preview window of a contact
Additional specific properties, that are also customizable, are available for each type.
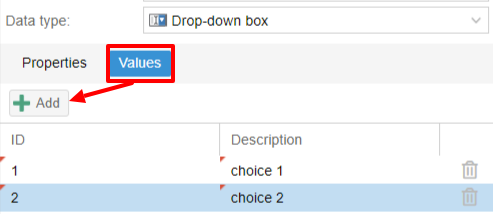
For the List box type it is necessary to fill in the values to be selected:
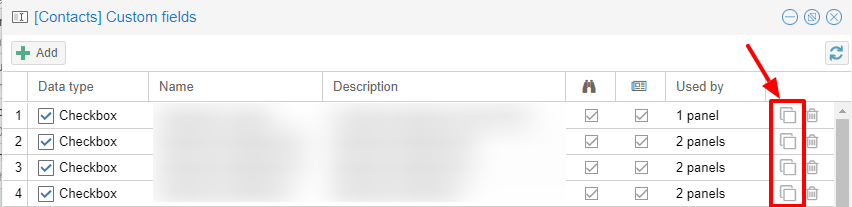
Using the Clone button you can copy the custom field to create similar ones:
Note
With the FREE version, installed by default, it is possible to create up to a maximum of 3 custom fields for each different module (3 in Address Book + 3 in Calendar + 3 in Activities). To remove this limit it is necessary to upgrade to the PREMIUM version by purchasing a dedicated license on Nethesis shop
Searches on custom fields#
One of the best functionalities of custom fields is the possibility to perform multiple searches on all modules and fields for which the option Show in search bar has been activated.
Custom panels#
Custom panels display the :ref:`custom_fields-section and associated them with resources.
Users with the authorization to manage custom fields can access the configuration panel using the button at the top right:
When creating a new panel it is mandatory to indicate the Name that will appear in the resource. You can also insert a Description and a Title.
Using shared labels, you can easily assign panels to specific resource categories. A panel without an associated label will be visible for every available resource: all contacts, all events or all activities.
Use the Add button to add a custom field inside the panel.
Mailcards#
One of the main features of managing signatures on WebTop is the opportunity to integrate images or custom fields profiled per user.
To use the images you need to upload them to the public cloud through the WebTop admin user like this:
You can use the Upload button to load an image which is at the bottom or simply via drag & drop.
Note
Remember that the public images inserted in the signature are actually connected with a public link. To be visible to email recipients, the server must be reachable remotely on port 80 (http) and its FQDN name must be publicly resolvable.
Alternatively, you can configure a global setting to turn images automatically into inline attachments instead of public internet links.
It is possible to do this from web interface by accessing the administration panel -> Properties (system) -> Add -> select com.sonicle.webtop.mail (Mail) and enter the data in the Key and Value fields according to the key to be configured:
public.resource.links.as.inline.attachments = true (default = false)
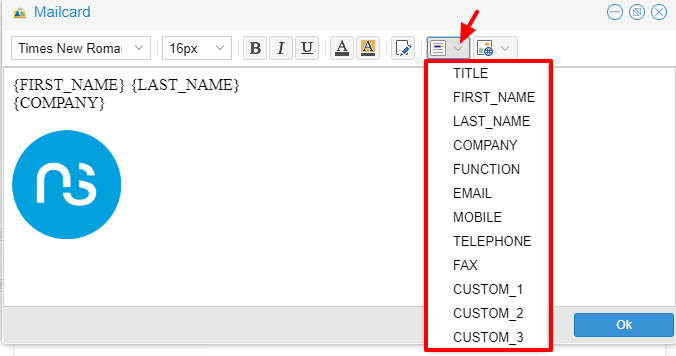
To change the signature, each user can access the :

You can use the uploaded image inside the mailcard with this button:

Note
The personal mailcard can be associated with the user or the mail address. Users with access to the mail address will also be able to use the mailcard.
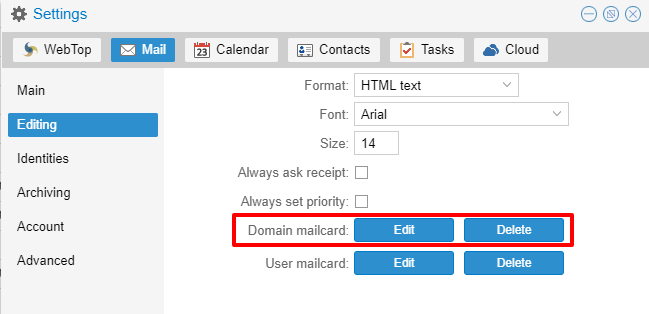
By accessing the user settings from the WebTop administration panel ( ) it is also possible to set up a general domain mailcard that will be automatically set for all users who have not configured their personal mailcard:
Furthermore, it will also be possible to modify personal details:
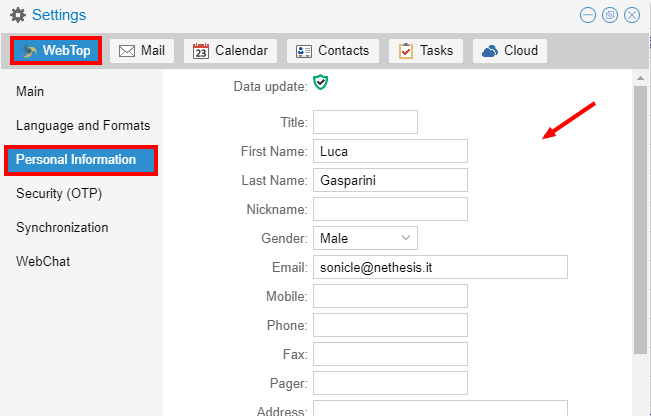
that can be used within the template-based fields within the domain mailcard editor:
In this way it is possible to create a single mailcard that will be automatically customized for every user who does not use his own mailcard.
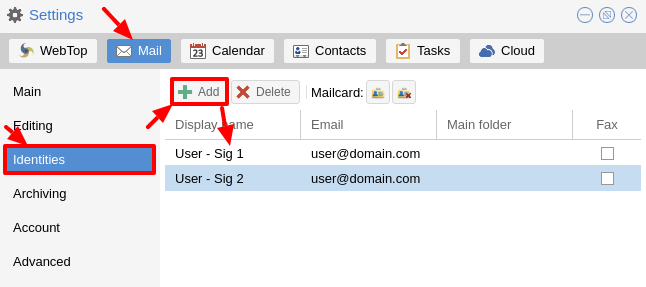
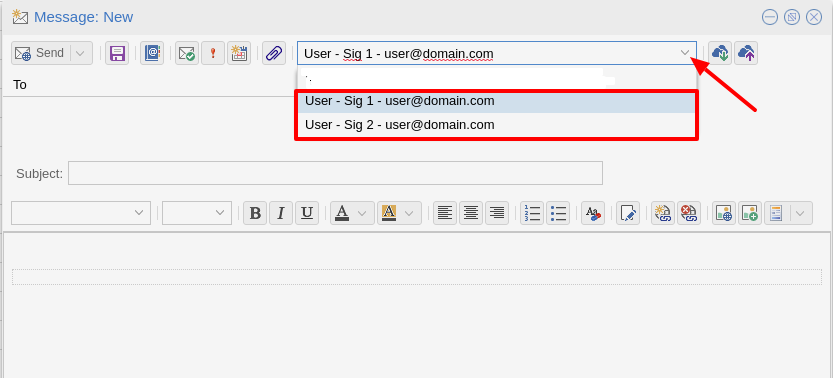
Multiple mailcards#
It is possible to configure multiple mailcards (HTML signatures) for each user.
Access the and create multiple identities:
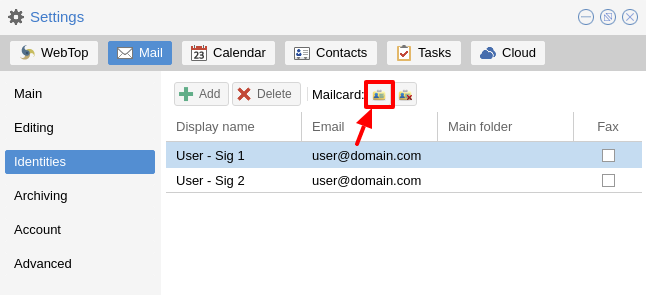
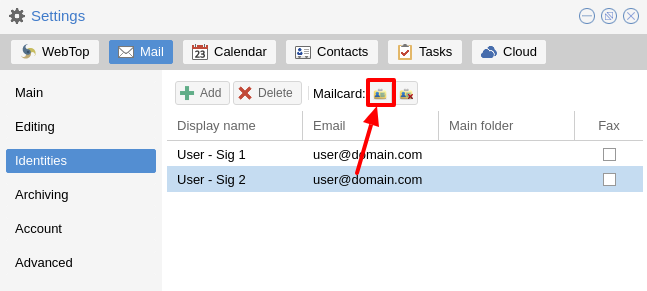
To edit every single signature select then select each individual signature and click on the edit mailcard button
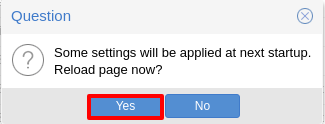
When finished, close the window and click YES:
to use multiple mailcards, create a new email, and choose the signature:
Mail inline preview#
By default, the mail page will display a preview of the content of the latest received messages.
This feature can be enabled or disabled from the Settings menu, under the Mail tab, the check box is named Show quick preview on message row.
Mail archiving#
Archiving is useful for keeping your inbox folder organized by manually moving messages.
Note
Mail archiving is not a backup.
The system automatically creates a new special Archives folder
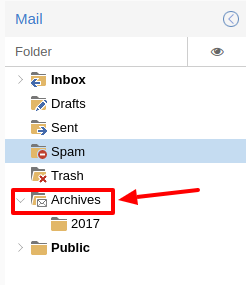
If the Archives folder does not appear immediately upon login, it will appear at the first archiving.
There are three archiving criteria:
Single folder: a single root for all archived emails
Per year: a root for each year
By year / month: a root for each year and month
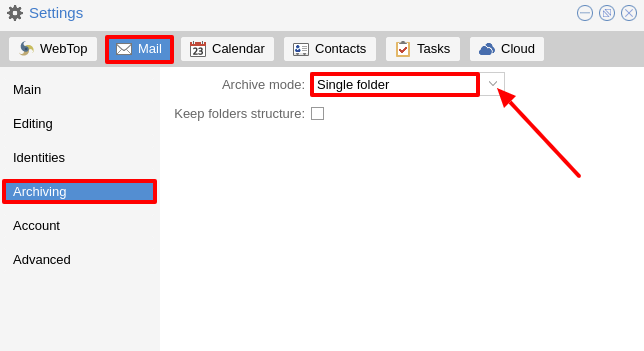
To maintain the original structure of the folders is possible to activate Keep folder structure

The archiving operation is accessible from the contextual menu (right-click). Click on Archive

The system will process archiving according to the last settings chosen.
IMAP folders subscription#
By default, all IMAP folders on the server are automatically subscribed and therefore visible since the first login.
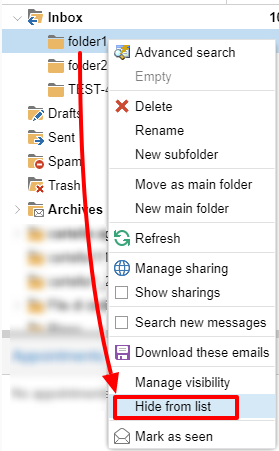
If you want to hide some folders from the view, which is equivalent to removing the subscription, you can simply right-click on the folder to hide and select from the interactive menu the item Hide from the list.
For example, if you want to hide the subfolder folder1 from this list, just right-click on it and select Hide from the list:
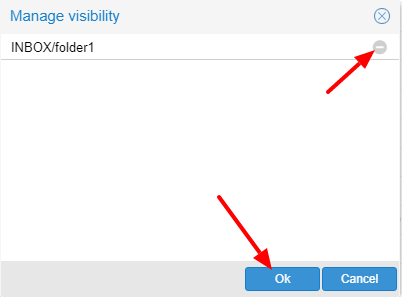
It is possible to manage the visibility of hidden folders by selecting the Manage visibility function:

For example, if you want to restore the subscription of the folder1 just hidden, just select it from the list of hidden folders and click on the icon on the left:
Customize proactive security on emails#
The Proactive Security module (PAS) warns the end user of possible security risks and suspicious senders inside the emails. The user will also be warned when trying to open potentially dangerous attachments or links contained in emails.
The PAS function allows some customization both for the end user and the WebTop admin.
For the end user it is possible to mark a sender as trusted when it is recognized as such by the yellow shield. To do so, it is possible to click directly on the shield or right click on the sender and select the Mark as trusted entry.
Note
This type of customization is only valid for the user that performed the action. It is possible to mark a sender as trusted only if the shield is yellow.
The admin user can disable all or some of the rules that are part of the PAS (ProActive Security), both for single users and groups.
To do so, it is necessary to add a specific authorization (to the single user or the group of users) for the Service com.sonicle.webtop.mail (Mail) and for the PRO_ACTIVE_SECURITY resource:
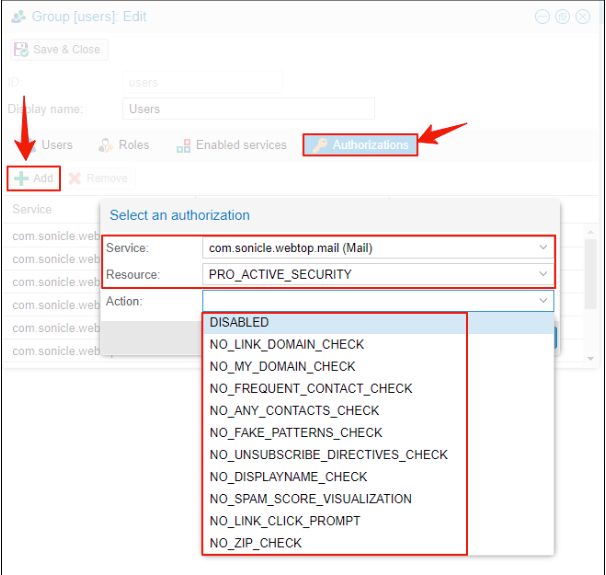
Below is an explanation of every single entry available as Action :
DISABLED: completely disables PASNO_LINK_DOMAIN_CHECK: do not check domains different from the sender’s domainNO_MY_DOMAIN_CHECK: do not verify if the sender’s domain is in my domainNO_FREQUENT_CONTACT_CHECK: do not check if the sender is in my contacts which are saved automaticallyNO_ANY_CONTACTS_CHECK: do not check if the sender is among one of my contactsNO_FAKE_PATTERNS_CHECK: do not verify the presence of false patterns in the sender (e.g. email address of the name shown is different from the sender’s email address)NO_UNSUBSCRIBE_DIRECTIVES_CHECK: do not check the entry for the unsubscribe directives to the mailing list (only if the spam status is green)NO_DISPLAYNAME_CHECK: do not compare the contact’s display name with the contact in my address book with the same emailNO_SPAM_SCORE_VISUALIZATION: do not show/check the spam score displayed in the message headerNO_LINK_CLICK_PROMPT: do not check the click action on linksNO_ZIP_CHECK: do not give warning about zip attachments
This way it is possible to customize and create special profiles for some users who might not want all the actions to be active.
The administrator can also choose the list of file extensions for attachments which are considered a threat.
As default, these are the extensions that are considered dangerous: exe,bat,dll,com,cmd,bin,cab,js,jar
To modify this list it is necessary to add this global setting:
Service =
com.sonicle.webtop.mailKey =
pas.dangerous.extensions
For example, if you wanted to add the HTML extension among those that are considered dangerous, the value field should contain the following:
Value =
exe,bat,dll,com,cmd,bin,cab,js,jar,html(Values always need to be separated by a comma)
Export events (CSV)#
To export calendars events in CSV (Comma Separated Value) format, click on the button in the top right corner and select ERP export (CSV)
Finally, select a time interval and click on Next to export into a CSV file.
Tasks#
Quick view filters#
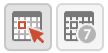
In the toolbar above the grid there are 7 buttons that allow you to select the most suitable quick view. The first two buttons refer to today’s activities or to those planned within the next 7 days:
Today: shows unfinished tasks without a start date or with a start date up to today (inclusive) and those completed with an end date up to today (inclusive)
Next 7 days: shows uncompleted tasks with no start date or starting up to 7 days from today and completed tasks with completion date up to now (inclusive)
The remaining 5 buttons allow you to obtain these other types of quick views:

Not started: shows only activities with status “To be started” and starting today (inclusive)
Late: shows only uncompleted tasks with start date up to today (inclusive) and completion date previous to the current one
Completed: shows all activities with status completed and with any date range
Not completed: shows all activities with status other than completed and start date within 1 year (for recurring tasks, only the first instance of the series still to be completed is shown)
All: shows all activities in any status (for recurring tasks the series icon main is shown)
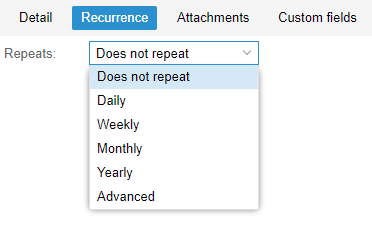
Recurring tasks#
It is possible to configure any type of recurrence:
Editing a recurring activity can be done in two different ways:
on the individual task by opening it with a double click from a view other than All In this case the task will be removed from the recurrence and its icon will become this one:

on the entire series with a double click from the All view or by using the following button on the single task already open:
Sub-tasks#
On any task it is always possible to add related sub-tasks (one Master/Slave level only) simply by using the right button and selecting Add sub-task Within the connected tasks, both in the master and in the slave, a link is available at the bottom right to open the related tasks:

It is possible to Move or Copy this type of activity (right click -> Move/Copy) by choosing to copy or move the sub-activities through an option active by default.
Multiple searches#
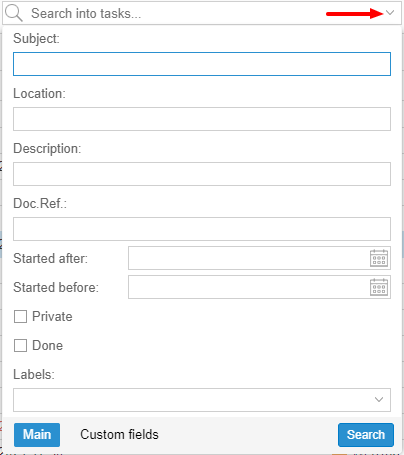
In the bar at the top there is a quick search that is executed on all fields. You can also narrow the search by filling multiple search fields.
Nextcloud integration#
Before proceeding, verify that the Nextcloud module has been installed from the Software center.
By default, Nextcloud integration is disabled for all users. To enable it, use the administration panel which can be accessed using the webtop admin password
If you want to enable the service for all users, proceed as follows:
access the administrative panel and select Groups:
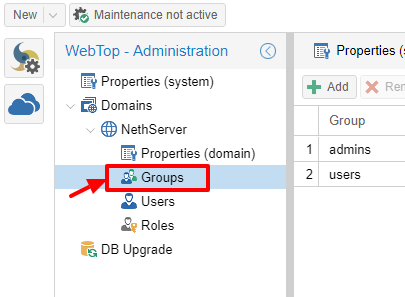
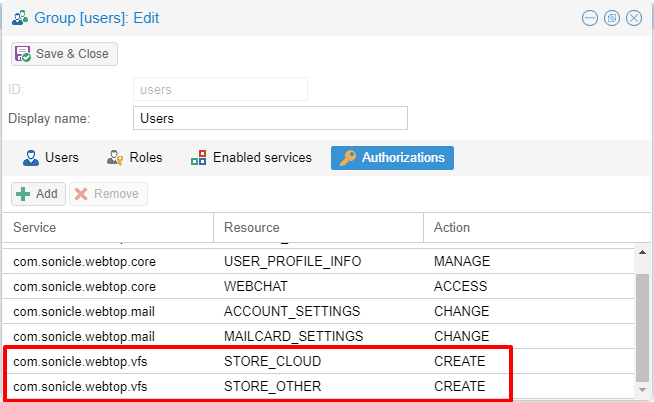
modify the properties of the “users” group by double-clicking and selecting the button related to the Authorizations:

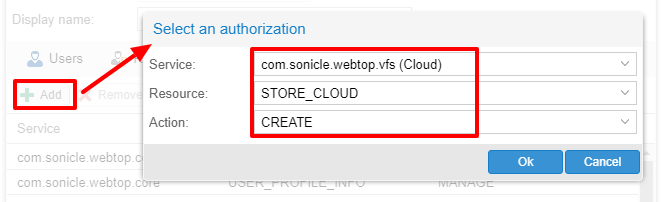
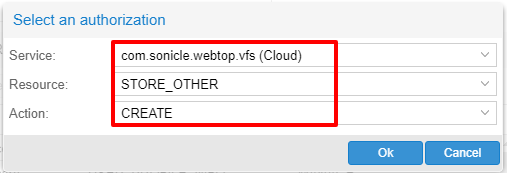
add to existing authorizations those related to both the
STORE_CLOUDandSTORE_OTHERresources by selecting the items as shown below:
to get this:
save and close.
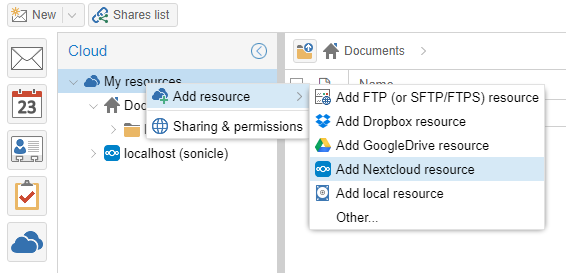
Fron now on, any user it will be able to insert the Nextcloud resource (local or remote) in the personal Cloud.
To do this, simply select the Cloud button and add a new Nextcloud resource by right-clicking on My resources and then Add resource in this way:
A pre-filled wizard will open:
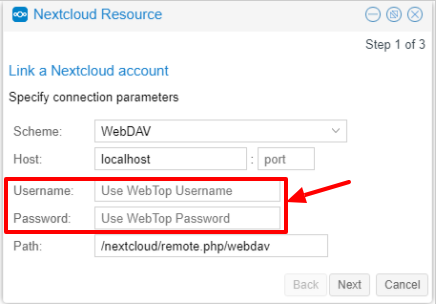
Note
Remember to fill in the User name and Password fields related to access to the Nextcloud resource, otherwise it will not be possible to use the public link to the shared files
Note
If Nextcloud has been configured with a custom virtual host (eg. nextcloud.mydomain.com) the Path must be changed from /nextcloud/remote.php/webdav to /remote.php/webdav, please note that /nextcloud prefix has been removed. Also make sure to enter the name of the custom virtual host inside the Host (eg. nextcloud.mydomain.com).
Proceed with the Next button until the Wizard is complete.
Personal Cloud#
The personal Cloud module allows you to send and receive documents via web links.
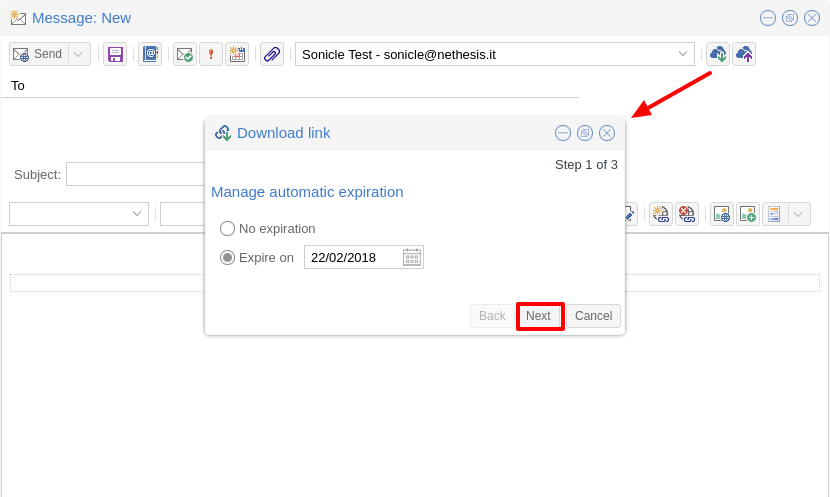
How to create a link to send a document#
To create the link, select the button at the top right:

Follow the wizard to generate the link, use the field date to set the deadline.
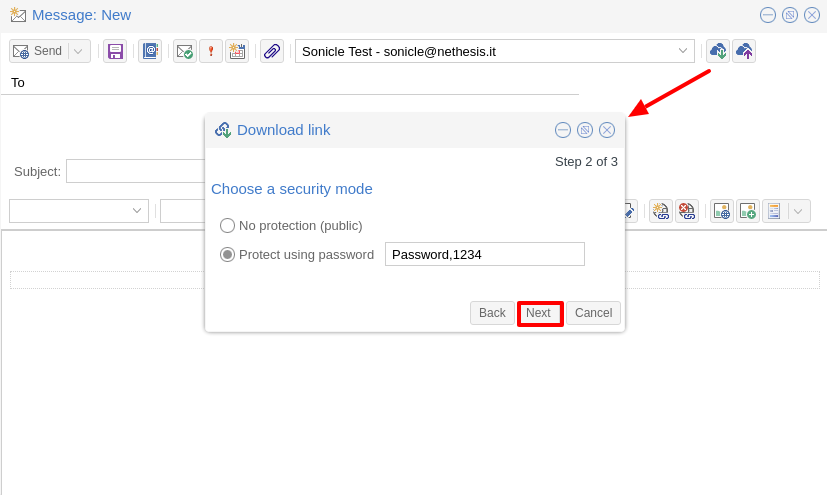
you can create a password to protect it:
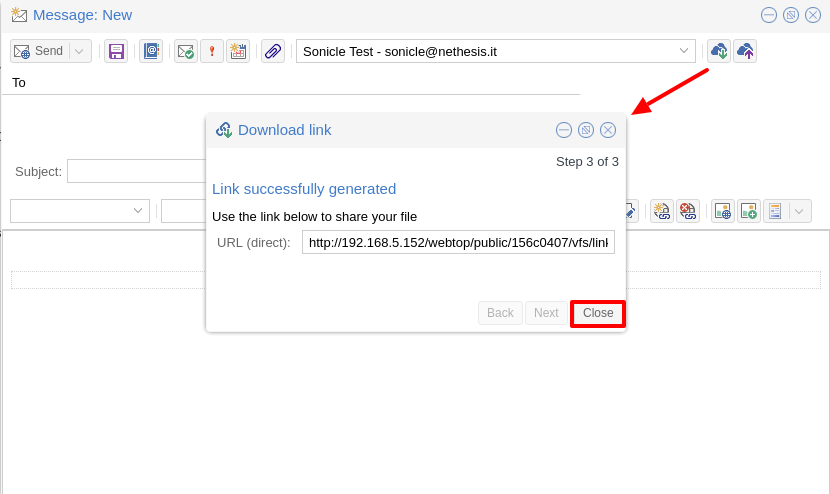
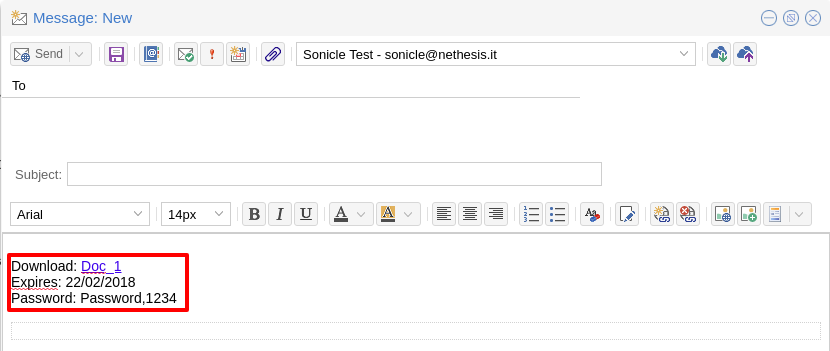
The link will be generated and will be inserted in the new mail:
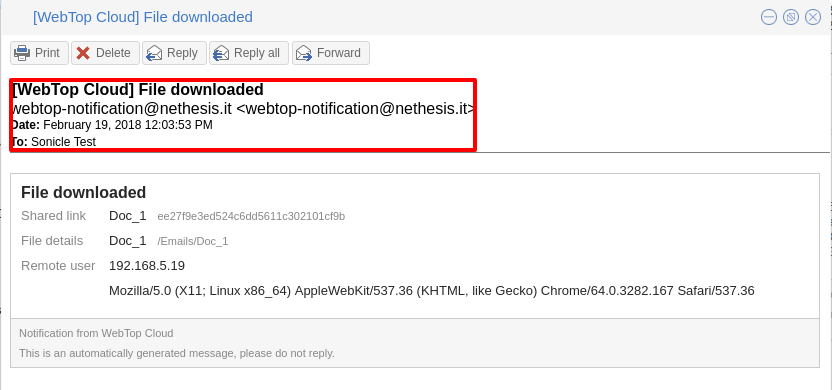
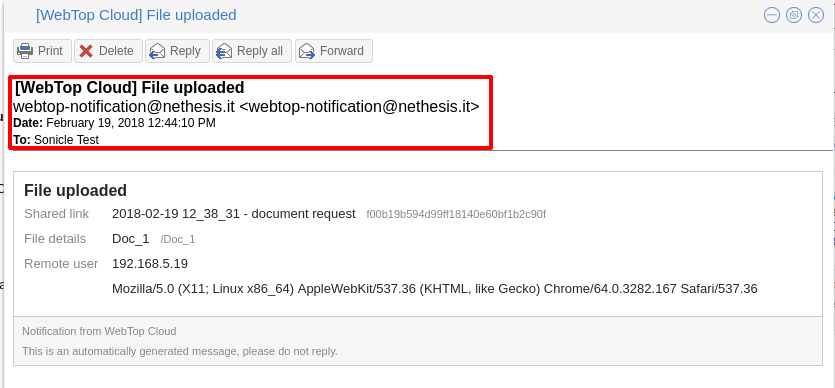
Downloading the file generates a notification to the sender:
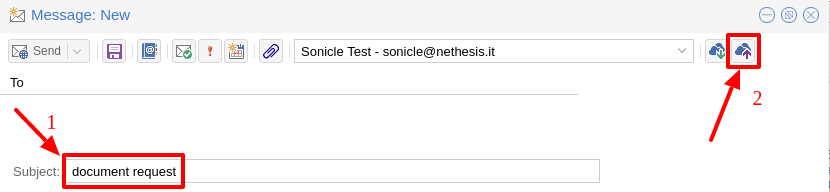
Request for a document#
To create the request, insert the subject of the email then select the button at the top right:
Follow the wizard. You can set both an expiration date and a password. The link will be automatically inserted into the message:
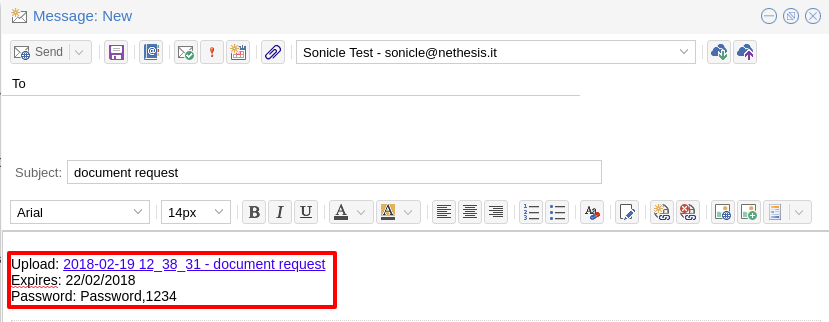
A request email will be sent to upload the document to the Cloud:
The sender will receive a notification for each file that will be uploaded:
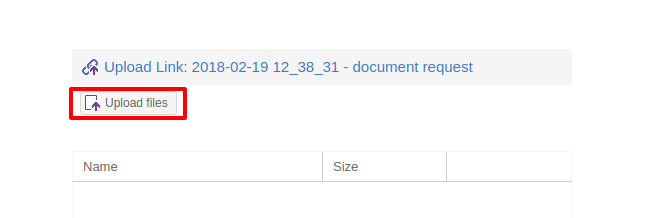
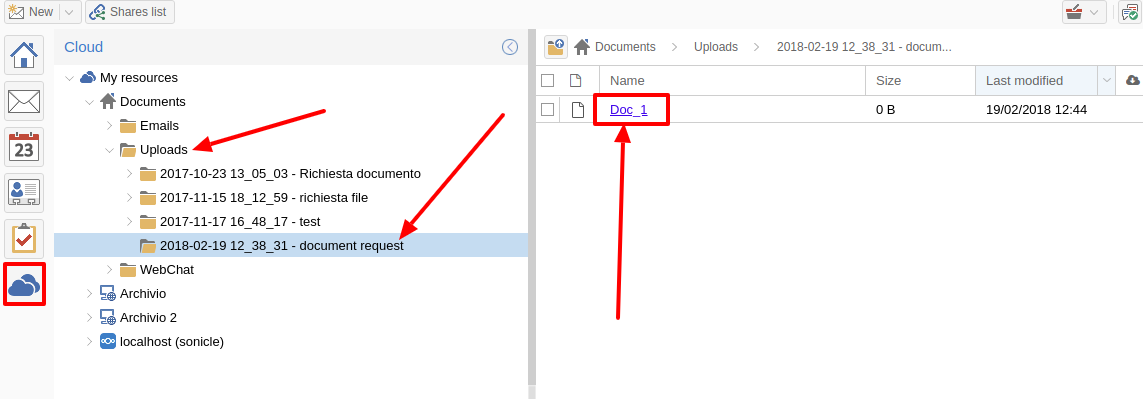
To download the files just access your personal with date and name:
Chat integration#
Web chat integration installation is disabled by default for all users.
To enable chat integration:
Install the “Instant messaging” module from Software Center.
Access WebTop as admin user then enable the web chat authorization:
Access the Administration menu, then
Click OK then save and close
Jitsi integration#
With this integration it is possible to start a new video conference and send the invitation via email, or schedule one by creating the event directly from the calendar. To activate the integration it is necessary to configure the Jitsi instance that you would like to use directly from admin panel by modifying the documented global settings
By default, the videoconferencing service is disabled for all users. To enable it, for all users it is necessary to add a specific authorization from the administration panel:
Access the Administration menu, then
Click OK then save and close
The conference will be available for the users after a new login.
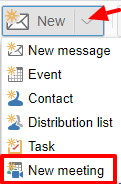
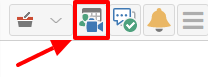
To create a new video conference meeting, you can start from these two buttons:
(top left)
(top right)
It is also possible to do this from a new email window or a new calendar event.
For each new meeting you have to decide whether it should start immediately (instant meeting) or if it should be scheduled by invitation.
There are several ways to share the new meeting link:
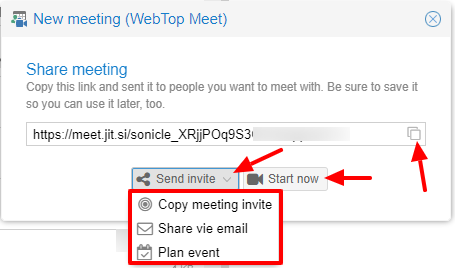
Start now allows you to immediately access the newly created meeting room and copy the link via the button available next to the URL
Send invitation -> Copy meeting invite: in this case an invitation message, which also includes the meeting link, will be copied (e.g: To join the meeting on Jitsi Meet, click this link: …)
Send invitation -> Share by email: you will be asked if you would like to change the subject and date of the meeting, which will then be inserted in the newly generated email:
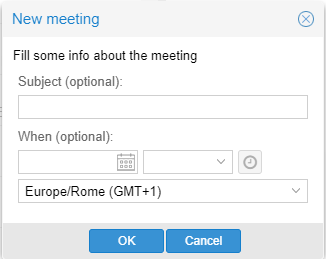
Send invitation -> Plan event: also in this case you will be asked if you would like to change the subject and date/time of the meeting before creating the calendar event that will allow you to invite other participants.
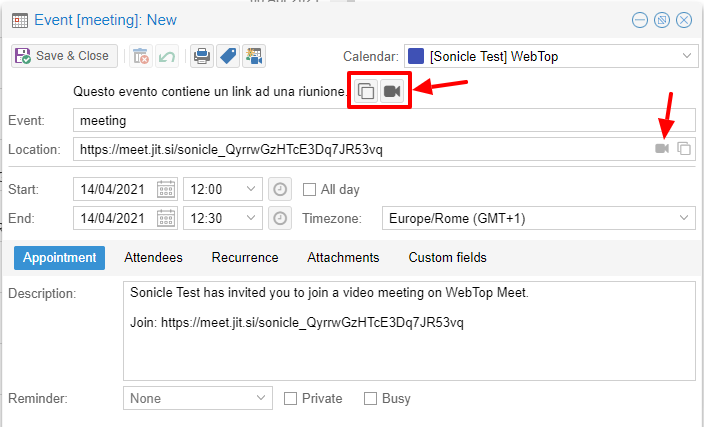
If an event contains a link to a third-party video conference, the buttons that will allow you to access the meeting directly:
Third-party video calls#
The video conferencing services that are currently supported, in addition to Jitsi, are: Google Meet, MS Teams and Zoom. It is possible to add additional platforms through a global setting.
SMS integration#
It is possible to send SMS (Short Message Service) messages to a contact that has the mobile number in the address book. To activate sending SMS, first you need to choose one of the two supported providers: smshosting or twilio.
Once registered to the service of the chosen provider, retrieve the API keys (AUTH_KEY and AUTH_SECRET) to be inserted in the WebTop configuration db.
The settings to configure are those shown here .
You can do it by accessing the administration panel -> Properties (system) -> Add -> select com.sonicle.webtop.core (WebTop) and enter the data in the Key and Value fields according to the key to be configured:
sms.provider = smshosting or twilio
sms.provider.webrest.user = API AUTH_KEY
sms.provider.webrest.password = API AUTH_SECRET
sms.sender = (default optional)
The sms.sender key is optional and is used to specify the default sender when sending SMS.
It is possible to indicate a number (max 16 characters) or a text (max 11 characters).
Note
Each user can overwrite the sender by customizing it as desired through its settings panel: WebTop -> Switchboard VOIP and SMS -> SMS Hosting service configured -> Default sender
To send an SMS from the address book, right-click on a contact that has the mobile field filled in -> Send SMS
Launcher customization#
The launcher is the icon-based menu on the left of the page. You can add custom buttons to the launcher.
To configure the buttons, access the WebTop administration panel and select -> Domains -> NethServer -> Launcher :

For each button, enter these three values
Name: tab descriptive text that appears with mouse-overLink URL: URL to be opened in a new browserIcon URL: icon image URL, it should always be a publicly reachable address. To avoid scaling problems, use vector images
If you can’t find a public URL for the icon image, you can upload the icon on Webtop public cloud.
WebTop public cloud already hosts mailcards images.
Access the administrator panel and click on Cloud -> Public Images,
then insert a URL like https://<public_name_server>/webtop/resources/156c0407/images/<icon.svg>.
The configured custom link buttons will be shown to all users at the next login.
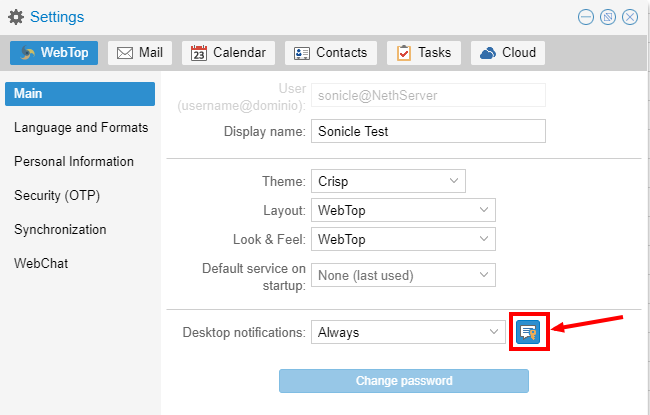
Browser notifications#
WebTop can notify new mail messages and upcoming calendar events.
To activate it, simply access the general settings of your user:
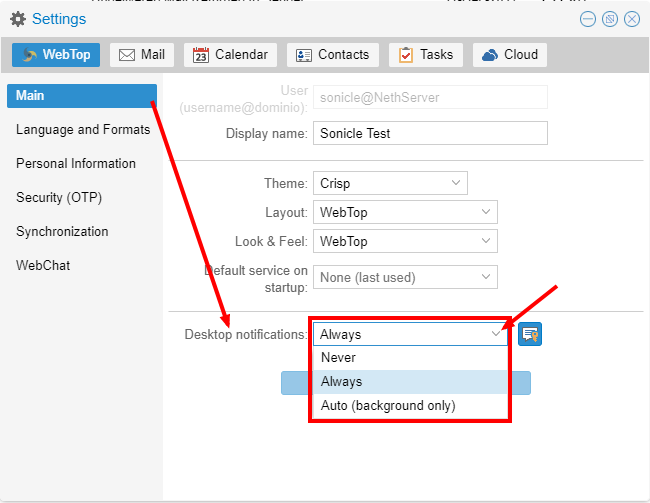
It is possible to enable desktop notifications in two modes:
Always: notifications will always be shown, even with the browser open
Auto (in background only): notifications will be shown only when the browser is in the background
Make sure to allow notifications inside your browser.
If you need to enable this consent later on a different browser just click on the appropriate button:
External IMAP accounts (Beta)#
External IMAP accounts can be accessed in read-only mode. Each user can have a maximum of 3 external accounts.
To enable the feature:
Access the administration panel, then selected Properties (system)
Click on Add button and select com.sonicle.webtop.mail
Create a new key named
external-account.enabledwith valuetrueGive a specific authorization to the user by setting:
Service:
com.sonicle.webtop-mailResource:
EXTERNAL_ACCOUNT_SETTINGSAction:
CHANGE
Users can now configure personal external accounts by accessing the Settings section.
Subscribing remote resources#
WebTop supports subscriptions to remote calendars and contacts (directory) using CardDAV, CalDAV and iCal.
Remote calendars#
An Internet Calendar can be added and synchronized. To do so just click the right button on personal calendars, Add Internet Calendar. Two types of remote calendars are supported: WebCal (ICS format) and CalDAV.
Note
Synchronization of Webcal calendars (ICS) is always done by downloading every event on the remote resource every time, while only the differences are synchronized with the CalDAV mode
Example of Google Cal remote calendar (Webcal only - ICS)#
Take the public access ICS link from your Google calendar: Calendar options -> Settings and sharing -> Secret address in iCal format
On WebTop, add an Internet calendar of type Webcal and paste the copied URL without entering the authentication credentials in step 1 of the wizard.
The wizard will connect to the calendar, giving the possibility to change the name and color, and then perform the first synchronization.
Note
The first synchronization may fail due to Google’s security settings. If you receive a notification that warns you about accessing your resources you need to allow them to be used confirming that it is a legitimate attempt.
Remote contacts (directory)#
Google CardDAV remote address book#
Steps:
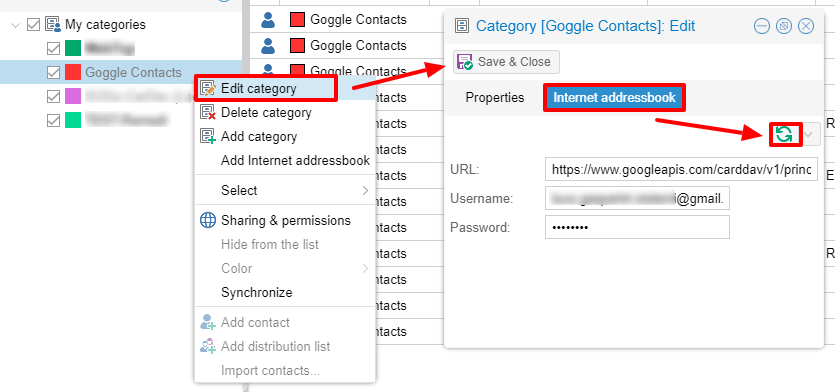
on Webtop, configure a new Internet address book, right-click on Personal Categories -> Add Internet address book and and enter a URL of this type in step 1 of the wizard:
https://www.googleapis.com/carddav/v1/principals/XXXXXXXXXX@gmail.XXX/lists/default/Replace theXwith your GMail accountenter the authentication credentials (as user name use the full address of gmail):
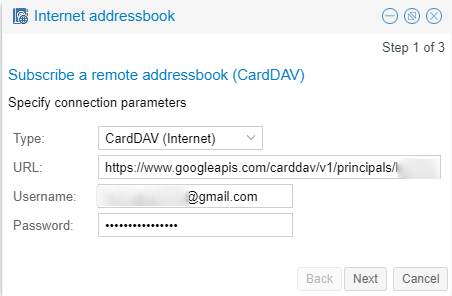
the wizard in the following steps will connect to the phonebook, giving the possibility to change the name and color, and then perform the first synchronization
You must enable the synchronization into your Google account and enable access for App Password.
Synchronization of remote resources can be performed manually or automatically.
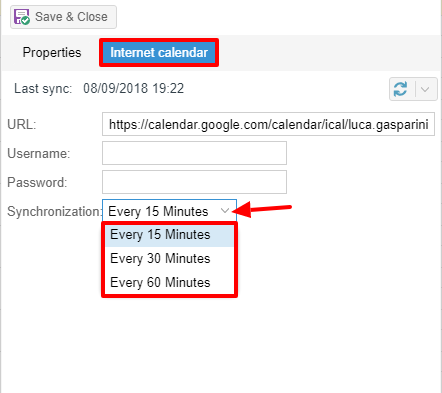
Automatic synchronization#
To synchronize automatically you can choose between three time intervals: 15, 30 and 60 minutes. The choice of the time interval can be made in the creation phase or later by changing the options. To do this, right-click on the phonebook (or on the calendar), Edit Category, Internet Addressbook (or Internet Calendar):
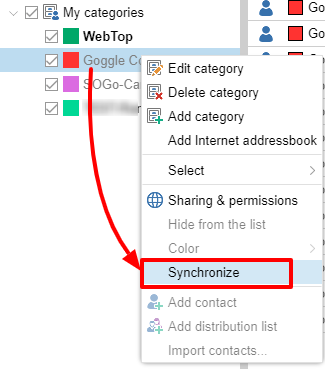
Manual synchronization#
To update a remote address book, for example, click on it with the right mouse button and then select the item “Synchronize”:
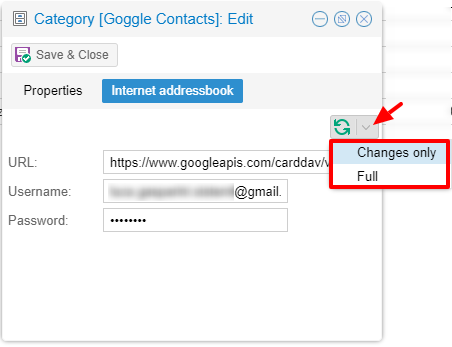
For CardDAV address books, as well as for remote CalDAV calendars, you can select whether to perform a full synchronization or only for changes. To do this, right-click on the phonebook (or on the calendar), Edit Category:
Select the desired mode next to the synchronization button:
User access and user session logs#
The table showing the entire log of accesses and sessions for each user is available under the administrator panel. Access the Administration menu, then Domains –> NethServer –> Audit (domain) –> Access log.
For each access, the table reports the following data in columns: session ID, user name, date and time, session duration, authentication status and any login errors.
You can enable public IP geolocation. First, you need to register an account on ipstack and obtain the API KEY to insert in the configuration db.
Login to the administration panel -> Property (system) -> add -> com.sonicle.webtop.core (WebTop) -> enter the following data in the fields Key e Value :
geolocation.provider=ipstackgeolocation.ipstack.apikey=<API KEY FROM PROVIDER>
Then, logout and a login again. To show the IP geolocation please click on the icon at the far right of the row:

Impersonate login
By default, the logins made through impersonate (admin!<user>) are not shown in the access logs table.
In order to also add this type of access, you need to add the following key for the core service:
key=audit.logimpersonated
value=true
New device notification#
You can receive an email that notifies when a new device accesses the account for the first time.
By default, this feature is disabled for all users to avoid too many unintentional false positives on first login.
You can customize this feature by accessing the administrator panel.
Note
Accesses made through impersonate (admin!<user>) will never send an email notification
Maximum file size limit#
There are pre-configured limits related to the maximum file size:
Maximum file size for chat uploads (internal default = 10 MB)
Maximum file size single message attachment (internal default = 10 MB)
Maximum file size for cloud internal uploads (internal default = 500 MB)
Maximum file size for cloud public uploads (internal default = 100 MB)
To change these default values for all users, the following keys can be added via the admin interface: Properties (system) -> Add.
The value must be expressed in bytes. Example: 10MB = 10485760 bytes.
Maximum file size for chat uploads
Service:
com.sonicle.webtop.coreKey:
im.upload.maxfilesize
Maximum file size for single message attachment
Service:
com.sonicle.webtop.mailKey:
attachment.maxfilesize
Maximum file size for cloud internal uploads
Service:
com.sonicle.webtop.vfsKey:
upload.private.maxfilesize
Maximum file size for cloud public uploads
Service:
com.sonicle.webtop.vfsKey:
upload.public.maxfilesize
Import contacts and calendars#
WebTop supports importing contacts and calendars from various file formats.
Contacts#
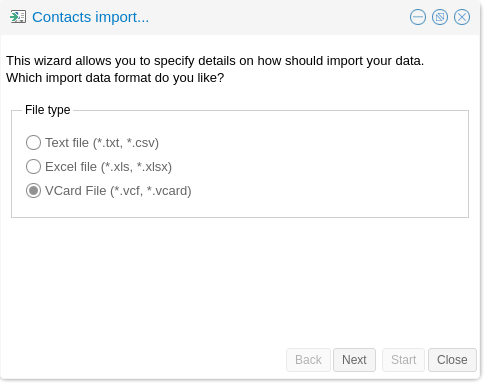
Supported contacts format:
CSV - Comma Separated values (*.txt, *.csv)
Excel (.*xls, *.xlsx)
VCard (*.vcf, *.vcard)
LDIF (*.ldif)
To import contacts:
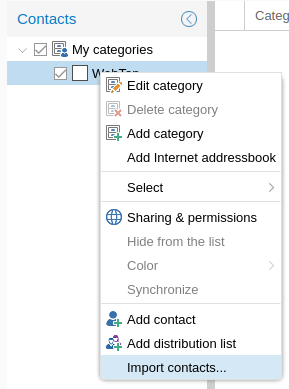
right click on the target phone book, then select Import contacts
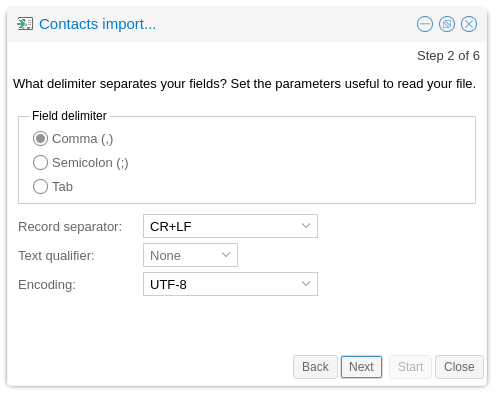
select the import format and make sure that the fields on the file match the ones available on WebTop
If you are importing a phone book exported from Outlook, make sure to set Text qualifier to " value.
Calendars#
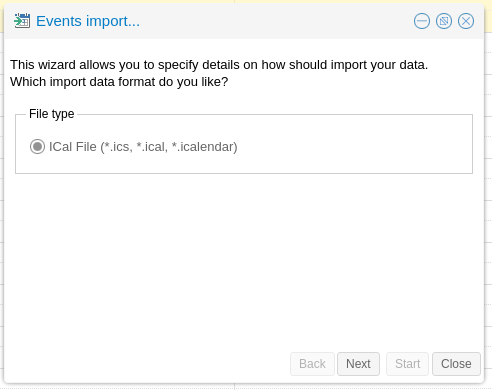
Supported calendar format: iCalendar (*.ics, *.ical, *.icalendar)
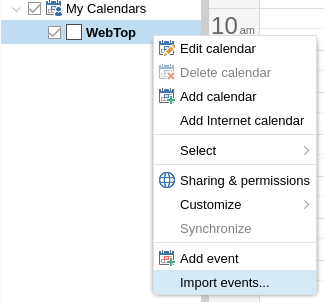
To import events:
right click on the target calendar, then select Import events
select the import format
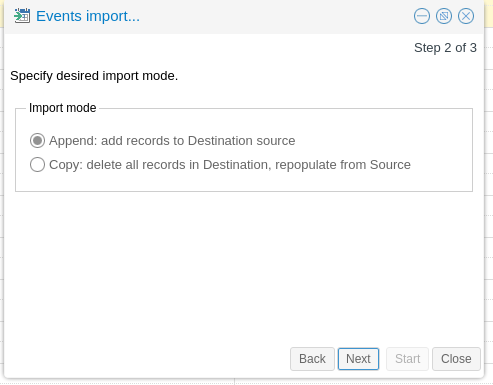
then choose if you want to delete all existing events and import new ones, or just append imported data to existing calendar events
Mail composer customization#
Hide auto-suggested recipient in lookups#
You can disable the suggestion of automatically saved addresses. Access the web administration panel -> Properties (system) -> Add ->, select com.sonicle.webtop.core (WebTop) and enter the data in the Key and Value fields according to the key to be configured:
recipient.provider.auto.enabled = false (default is true)
Edit subject of a mail and save it#
To enable the modification of the subject for received and sent emails, access the web administration panel -> Properties (system) -> Add -> select com.sonicle.webtop.mail (Mail) and enter the data in the Key and Value fields according to the key to be configured:
message.edit.subject = true (default is false)
Delete automatically suggested email addresses#
When compiling the recipient of a mail, some automatically saved email addresses are suggested. If you need to delete someone because it is wrong, move with the arrow keys until you select the one you want to delete (without clicking on it), then delete it with Shift + Canc